Chicken and Red Potato Soup with Onions and Sherry

Chicken and Red Potato Soup with Onions and Sherry

This is one of my all-time favorite winter soups. The caramelized onions and sherry impart an incredible richness to the broth, and the potatoes keep it feeling like comfort food.

2 lbs chicken, cut into tenderloins

10 red potatoes, washed and diced

Baby greens (such as spinach, kale, or chard)

5 cups chicken broth

1 sweet yellow onion, diced

3 cloves garlic, minced

1/2 c sherry

2 tsp smoked paprika

salt and pepper, to taste

Preheat the oven to 350 degrees. Pour several tablespoons of olive oil in a baking dish and add 2-3 tsp of Italian seasoning and some salt and pepper. Add the chicken tenderloins and toss to coat. Set aside.

IMG_4844Melt olive oil and butter in a large soup pan, then add the onions once hot. Once the onions have begun to get nicely colored, add the garlic and stir for about 45 seconds. Then deglaze the pan with 1/4 cup of sherry and stir till the sherry has soaked in/evaporated. Do the same with the remaining 1/4 cup.

As you continue stirring, the onion and garlic will caramelize beautifully. Add more butter to the pan while you stir if you really want to amp up the richness.

IMG_4845Add salt, pepper, and paprika, then add the chicken broth and the potatoes.

Place the chicken in the oven. Bring the broth to a simmer and set the timer for 15-18 minutes. Simmer until the potatoes are cooked through and soft. Check the chicken and if done, remove from the oven and place on a cutting board to cool.

At this point, you can puree a little bit of the soup to thicken the broth, or you can leave as is.

IMG_4846Dice the chicken and add to the pot. Taste the broth and season more if necessary.

To serve, place a handful of baby green in the bottom of each bowl and ladle the soup on top. The hot broth will wilt the greens just perfectly.

This is also really good with crusty bread and some nice Chardonnay.

Black Bean Soup

IMG_4840

2 cans black beans

3 cups vegetable broth

1 red onion, diced

3 cloves garlic, minced

2 T cumin

1 T smoked paprika

1/8 tsp merken

salt and pepper, to taste

Saute the diced red onion in some olive oil until slightly carmelized, then add the garlic. Cook, stirring occasionally, for about 1 minute, or until the garlic is fragrant. Be careful not to burn. Add the spices and stir for another minute, then add the beans and the broth. Heat through and allow to simmer for about 15-20 mins to allow the flavors to come together. Puree about 2/3 of the soup in a blender and then add back to the pot. Top with diced avocado, artichoke hearts, and fire roasted red pepper pesto if desired.

Sour Chickpeas

12 oz. chickpeas, dry
3 pints water
10-11 oz onion, very finely chopped
2 1/2 tsp salt
1/2 – 1 fresh hot green chilli, finely chopped*
1 T peeled, finely grated fresh ginger
1/4 cup lemon juice
6 T vegetable oil
8 oz. tomatoes, finely chopped
1 T ground coriander
1 T ground cumin
1/2 tsp ground turmeric
2 tsp garam masala
1/8 – 1/4 tsp cayenne pepper

Soak the chickpeas overnight. Put the chickpeas and their soaking liquid in a large pot. Bring to a boil, cover, lower heat, and simmer gently for 1 1/2 hours or until tender. Strain the chickpeas and save the cooking liquid.

Combine 2 T onion, 1/2 tsp salt, green chilli, ginger, and lemon juice in a teacup. Mix well and set aside.

Heat oil in a heavy, wide pan over medium-high heat. Add remaining onion and saute for 8-10 minutes. Add the tomatoes. Continue to stir and fry for 5-6 minutes, mashing the tomatoes with the spoon. Add the coriander, cumin, and turmeric and cook for about 30 seconds.

Add the drained chickpeas, 14 oz of reserved cooking liquid, remaining salt, garam masala, and cayenne. Bring to a simmer. Cover, reduce heat to low, and cook very gently for 20 minutes, stirring occasionally.

Add the mixture in the teacup. Stir just to blend. Serve hot or lukewarm.

From Madhur Jaffray’s Indian Cooking. Good with basmati rice and a vegetable (cabbage and peas, or green beans and tomatoes).

*Depending on your chilis, a whole one can be really really spicy. I regularly halve the amount of chili and cayenne and then add more if I want it.

Lemon Poppyseed Quinoa Cereal

1 cup coconut milk
1 cup water
1 cup quinoa
1/2 tsp salt
1 1/2 tsp poppy seeds
grated zest of 1 lemon
1 1/2 T honey, or to taste
1/3 c sliced almonds

In medium saucepan, bring the coconut milk and water to a boil. Add quinoa and salt, reduce heat to low, and simmer, covered, for 15 min. Add extra liquid if necessary.

Stir in poppy seeds, lemon zest, and honey. Serve hot, topped with nuts and additional milk.

Adapted from Super Natural Every Day, where it is made with bulgur wheat. 

Edited to say that I think in future I would use more coconut milk or less quinoa, since it turned out pretty dry and not very cereal-like.

Chicken and Fruit Salad

Here’s a recipe sure to bring back memories of hot summer nights.  I think this would also make a refreshing lunch to pack, now that school has begun.  Av, Amy & I are off gluten, so looking for lunch ideas especially.  Check out the book “Wheat Bellies” & you may all choose this path of gluten-free.

2 whole boneless chicken breasts (8 oz. each) (Or market chicken already roasted, for time saver)

1 green onion, chopped

1 celery stalk, chopped

¼ cup mayonnaise

Salt and pepper to taste

Gently simmer chicken breasts in which covers the chicken. Do not let boil as this makes the chicken tough. Cool and cut into 1-inch pieces.

Mix above ingredients together and set aside.

1/3 large pineapple (fresh is best with this recipe)

3 oz. grapes, cut in half

1 mango, optional

1 small jalapeno pepper, finely chopped in food processor

Cut fruit up and mix with: 2 teaspoons canola oil 2 teaspoons lemon juice (I have made this without using the oil and lemon juice; it is good either way.) Can be made up to 1 day ahead. Just before serving, line a platter or individual plates with red leaf lettuce leaves. Mound chicken salad in center and surround with fruit. Makes six 6-ounce servings.

Raw Broccoli Salad

Dana made this for her lunch today and told me about it. I’m going to have it for lunches next week at work. You could add diced ham, or tuna, or salmon, to make it a more substantial meal or for extra protein.

1 T wholegrain mustard
1 T sherry vinegar
1 head broccoli
1 avocado
handful roasted almonds

Combine the mustard, vinegar, and 3 T extra virgin olive oil in a salad bowl. Season. Chop the broccoli into tiny trees and toss in the dressing. Chop the avocado in half and scoop bite-sized chunks into the dressing with a spoon. Toss the salad to distribute the dressing and serve with almonds on top.

Those with nut allergies can substitute red onion.

Summer Minestrone

This is a recent successful combination of several minestrone recipes (Joy of Cooking and Love Soup). It does involve lots of chopping, but it makes a big pot and keeps beautifully all week. I’ve been making it on Sunday nights for the last two weeks and eating it for lunches.

1 large onion, chopped
3 cloves garlic, minced
1 large carrot, peeled and diced
2 stalks celery, chopped
1/2 lb. green beans, trimmed and cut in 1-inch lengths
2 zucchini, diced
2 sprigs fresh rosemary, chopped
1/2 cup fresh basil, chopped (a generous handful)
1/2 cup fresh parsley, chopped (again, no need to be too precise)
1 roasted red bell pepper, diced (out of a jar!)
1 can diced tomatoes (14 oz)
1 can cannellini beans, drained and rinsed
10 cups broth (I use 10 cups water and 3 cubes Rapunzel vegetable bouillon)
1 cup small pasta (orzo, elbow macaroni, baby shells)
1 tsp salt (depending on your broth)

Saute onions in 2 T olive oil until soft. Add remaining vegetables and herbs (I just chop and add as I go, stirring occasionally) and saute for a few minutes. Add canned tomatoes, beans, and broth. Bring to a boil, reduce heat, cover and simmer for 20 minutes. Add pasta and cook for 10 more minutes. Taste and season if necessary.

Serve with a drizzle of olive oil, a grind of black pepper, and a sprinkle of parmesan. Get yourself a baguette and a glass of white wine, and you are set!

Variations: I keep forgetting to actually try this, but apparently you can throw in the rind from a wedge of parmesan cheese while the soup simmers, and it gives the vegetable broth a great flavor. You can also use chicken broth.

If you want to be really decadent (a la Joy of Cooking), you can add two chopped slices of bacon when you start sauteeing the onions.

Chickpeas are the beans of choice in the Love Soup version. I’m always a fan of either type.

I’m sure spinach or chard would be a nice addition or substitution to the vegetables. Jarred roasted red peppers are what I had, and I like the convenience, but you could either roast your own or just put in a fresh pepper. You could also use fresh tomatoes, and/or more of them. (I’ve actually been putting in 1 1/2 small cans, or 3/4 of a large can, but that isn’t very efficient in recipe-writing terms. Fortunately I’ve done it two weeks in a row and used up the extra.)

Stir-fry

This is more of a template than a recipe, since you can use any combination of vegetables and protein you like, with a very simple but delicious sauce.

I tend to do onion, broccoli, red bell pepper, and mushrooms as a basic veggie formula. Recently, in order to save myself all the chopping time, I’ve been using frozen stir-fry vegetables. These can be expensive, but Costco has a nice mix for a reasonable price, and it’s a good thing to keep in your freezer for emergencies.

Here’s the method:

Choose your protein. I’ve used chicken, shrimp, and tofu all very successfully. This gets cooked first. Cube the chicken or tofu, or peel the shrimp, and cook on high heat with a little canola oil until cooked through (in the case of chicken/shrimp) or browned on most sides (tofu). Note on tofu: it always sticks to my wok something awful, so I tend to do it in a separate non-stick skillet. Remove to a plate or bowl.

Add a little more oil to your skillet or wok and start cooking vegetables. If using fresh vegetables, add the ones that need the longest cook time first (e.g. onion and broccoli) and proceed in order every few minutes. If using frozen vegetables, put a lid on the skillet for part of the time so the steam can help the veggies defrost faster.

Sauce. In a small glass measuring cup, combine 1 cup vegetable broth, 3-4 T tamari, and a heaping T corn starch. Whisk.

When the vegetables are almost cooked but still crispy (or thawed and almost hot), add the protein and the sauce to the wok and stir. As soon as the sauce starts to boil, it will thicken and turn clear, and you are done. Serve with the spiced coconut rice.

Variations and Remarks: I’ve made the sauce with chicken broth, but I actually like it better with vegetable broth (even when using chicken in the stir-fry) because the chicken broth is too overpowering of the other flavors.

Last week I was unexpectedly out of broth of all sorts, so I improvised. San-J has a line of gluten-free Asian sauces, and I had bought a few to experiment with, so I had a GF teriyaki sauce in the fridge. I dumped a third of the bottle in with my veggies, and fearing that the water from the frozen veggies would dilute it too much, recklessly added a splash of tamari and a sprinkle of corn starch. Brooks claims this was the best stir-fry of all time although I don’t necessarily recommend using your good teriyaki sauce on it on a regular basis.

Spiced Coconut Brown Rice and Tamari-Roasted Kale

This is the best brown rice ever. You can do it soaked or unsoaked (soaking just makes it a little fluffier), with or without the coconut oil, and it’s always good. I usually make it with my basic stir-fry, which I’ll put in a separate post.

Make the whole amount so you have leftovers. Today for lunch, I had leftover rice with tamari-roasted kale and coconut, and it was fantastic. You can’t beat brown rice, greens, and good fats for a vegan power-lunch. 🙂 

Spiced Coconut Brown Rice
Adapted slightly from the Gluten-Free Girl.

2 cups brown rice
1/2 can (7 ounces) coconut milk
juice of 1 medium-sized lime
2 tablespoons coconut oil
1 teaspoon Madras curry powder
1/2 teaspoon powdered ginger
1/2 teaspoon kosher salt
1 teaspoon cracked black pepper

Soak the rice in cool water for at least 1 hour (optional). Drain and rinse.

Combine all ingredients in a pot with 3 1/4 c water. Bring to a boil, reduce heat to low, cover, and simmer 45-60 minutes.

Tamari-Roasted Kale
Adapted from Heidi Swanson, Super Natural Every Day (a lovely vegetarian cookbook)

1 tsp toasted sesame oil
1 1/2 T tamari
3 T olive oil

1 medium bunch kale, stemmed and coarsely chopped
1 cup large-flake unsweetened coconut

Preheat oven to 350 degrees. Whisk the oils and tamari in a small bowl. Toss the chopped kale and coconut with the dressing. (I just do this right on the rimmed baking sheet to save a dish.) Spread on a rimmed baking sheet and bake 8-10 minutes, tossing once mid-way through. Keep an eye on it, since it can over-cook very quickly. You want the coconut a little brown and the kale just wilted and crispy around the edges.

If you can’t find the large flake coconut, use half or a third the amount of the shredded kind.

I’m sure this would be lovely with quinoa, as well.

Emeril’s Black Bean Cakes

I had one of my most memorable meals at Del Inti here in Portland, for Adam’s and my 6th anniversary. We shared a huge grilled chop, topped with apricot reduction, and sides of black bean cakes, grilled summer squash, potato gratin, and ceviche. I’ve been thinking about it ever since, and last night I thought I’d try to recreate it. I chose the black bean cake recipe from emeril.com, and they were fantastic! I used egg replacer and sorghum flour to make them work for us.

Emeril says, “Talk about “knock your socks off”! These bean cakes end up crispy and crusty on the outside, but oh so tender and creamy on the inside. A true study in contrasts, this dish is elevated to notches unknown when served garnished with your favorite guacamole, salsa, and sour cream.”

Ingredients

    7 tablespoons olive oil
    1 small onion (5 to 6 ounces), cut into small dice
    2 teaspoons minced garlic
    1/2 cup all-purpose flour
    2 tablespoons Emeril’s Original Essence or Emeril’s Essence Creole Seasoning
    Two 15.5-ounce cans black beans, drained and quickly rinsed
    2 tablespoons chopped fresh cilantro, plus more for garnish
    1 egg, lightly beaten
    1/2 teaspoon salt, plus more to taste
    1/2 teaspoon freshly ground black pepper
    1/2 teaspoon ground cumin
    1/2 teaspoon ground coriander
    2 teaspoons hot sauce

Instructions

Heat 1 tablespoon of the olive oil in a medium saute pan over medium heat. When it is hot, add the onion and cook until soft and lightly caramelized, about 3 minutes. Add the garlic and cook until fragrant, about 30 seconds. Remove from the heat and set aside to cool.

Place the flour in a shallow bowl or plate, and stir in the Essence. Set aside.

In a medium mixing bowl, mash the black beans well with the back of a fork — the mixture should be relatively smooth, with no whole beans remaining. Stir in the cooled onion mixture, cilantro, egg, salt, pepper, cumin, coriander, and hot sauce and mix well. Divide the mixture into 8 evenly sized patties (about 1/3 cup each).

Heat the remaining 6 tablespoons olive oil in a medium nonstick skillet over medium heat. When the oil is hot, dust the patties in the seasoned flour mixture and carefully transfer them to the hot skillet (the cakes will be delicate). Cook the cakes until golden brown on both sides and heated through, about 2 minutes per side.

If necessary, season with more salt. Garnish with chopped cilantro, and serve immediately.

Yield: 4 servings

Cinnamon-Apple Popcorn

An old favorite and a must-have for snacking while decorating the Christmas tree.

2 cups dried apples, chopped
10 cups popped popcorn
2 cups pecan halves
4 Tablespoons butter, melted
1 teaspoon cinnamon
¼ teaspoon nutmeg
2 Tablespoons brown sugar
¼ teaspoon vanilla extract

Preheat oven to 250 degrees. Place apples in a large shallow baking pan.
Bake 20 minutes. Remove pan from oven and stir in popcorn and nuts. In a
small bowl, combine remaining ingredients. Drizzle butter mixture over popcorn
mixture, stirring well. Bake for 30 minutes, stirring every 10 minutes. Pour onto
waxed paper to cool. Store in airtight container.

Yield: 14 cups of snack mix

Homemade Granola

Preheat oven to 300 degrees.

Mix in large bowl:
4 cups old-fashioned oats
1 cup flaked coconut
1 cup coarsely chopped pecans or walnuts
½ cup unsalted sunflower seeds
½ cup wheat germ
½ cup firmly packed light brown sugar
1 teaspoon ground cinnamon
1 teaspoon salt

Mix together in small bowl:
½ cup vegetable oil
½ cup water
2 Tablespoons honey
1 teaspoon vanilla

Pour liquid mixture over oat mixture; mix well. Lightly grease a 15 x 10 x 1 inch jelly roll pan. Bake for 1 hour, stirring every 15 minutes, until golden brown and slightly crunchy. Let cool. Stir in 1 cup raisins

Makes 9 cups

Crunchy Top Bananas

Remember this?

Topping:

2 Tbls brown sugar
2 Tbls melted butter
2 tsp lemon juice
1/4 tsp cinnamon
2 Shredded Wheat biscuts, crumbled
2 large bananas

Combine topping ingredients.
Cut peeled bananas in half, then slice lengthwise.
Place in square baking pan.
Spoon topping over each banana slice.
Broil 1 – 2 minutes or until golden brown.

Roasted Sweets & Greens

Roasted Sweets & Greens

“These simple and satisfying wedges are seasoned with garlic and paired with crunchy hazelnuts, then finished as they come out of the oven with a handful of peppery arugula and a splash of vinegar.” – Better Homes & Gardens magazine

Prep: 10 min
Roast: 35 min

Ingredients:
1 1/2 to 2 lbs sweet potatoes and yams, scrubbed
1 Tbsp olive oil
1/2 tsp salt
1/4 tsp ground black pepper
2 garlic cloves, minced
1/4 cup hazelnuts (pecans or walnuts also good)
2 cups arugula
2 Tbsp vinegar, or to taste

Directions:
Preheat oven to 400. Cut sweet potatoes in half lengthwise and then cut into wedges. Place on a large rimmed baking sheet. Toss with oil and season with salt and pepper.

Roast in preheated oven 10 minutes, toss, then roast 10 minutes more or until tender. Sprinkle with chopped garlic and nuts and return to oven to 5 minutes or until nuts are toasted and garlic is tender. Remove from oven and sprinkle with arugula and vinegar. Serve immediately.

Fish Tacos with Chili Lime Cream

Fish Tacos with Chili Lime Cream

This is a pretty easy recipe I found in a Better Homes and Gardens magazine. I’ve made it for Uncle John and Aunt Linda, Jena, Mom, Amy, and Morgan to great reviews so I think it’s a keeper. The only dairy is the sour cream which can easily be substituted for a dairy-free alternative.

Ingredients:

1 lb fresh tilapia or cod fillets

1/2 teaspoon chili powder

1 lime, halved

1/2 cup sour cream (or dairy free alternative)

1/2 teaspoon garlic powder

8 corn tortillas

2 cups shredded cabbage mix

1 avocado, halved, seeded, peeled, and sliced (optional)

1 cup cherry tomatoes, quartered (optional)

Directions:

Preheat broiler. Sprinkle fish with 1/4 teaspoon of the chili powder and 1/4 teaspoon salt. For chili lime cream, in bowl squeeze 2 teaspoons juice from half the lime. Stir in sour cream, garlic powder, and remaining chili powder. Set aside. Cut remaining lime into wedges for serving.

Place fish on unheated, greased broiler rack; tuck under thin edges. Broil fish 4 inches from heat 4-6 minutes per 1/2-inch thickness, until fish flakes with fork. (I start frying the tortillas when fish is about half way done, since they don’t take very long.) Break fish in chunks. Serve with cabbage, chili lime cream, avocados, tomatoes, and lime. Serves 4.

Roasted Butternut Squash Soup

Super easy and delicious any time of year!

Serves: 8

Ingredients:
2 Tbsp olive oil
1 sweet or yellow onion, diced
1 2lb butternut squash, peeled, halved lengthwise, seeds discarded
2 cups chicken broth
pinch grated nutmeg
1 cup nonfat milk (or milk of your choice)
Nonfat sour cream (optional)
Chopped fresh chives (optional)

Directions:
Squash prep – Peel squash with a veggie peeler, then cut top off bottom bulb to make it easier to handle. Cut both pieces lengthwise into halves, and scoop out seeds with a spoon.

In a large pot, heat olive oil over medium-high heat. Add onion and saute until translucent, about 7 minutes, stirring occasionally. Add squash pieces and 1 cup of water; cover. Lower heat to medium and cook for 20 minutes, stirring occasionally until the squash is fork-tender.

Place the squash-and-onion mixture into a food processor or blender two batches if necessary. Pulse until squash is well pureed. Add the chicken broth, nutmeg, and milk; pulse until well combined.

Return the soup to the pot and heat through. Season with salt and pepper. To serve, ladle into individual bowls and top with 1 tsp nonfat sour cream and chopped chives if desired. (From Muscle+Fitness Hers magazine)

Chicken Mango Lettuce Bundles with Ginger Dipping Sauce

This dish is served rolled up in large lettuce leaves, like a salad wrap sandwich. Arrange the accompaniments on a large platter and let guests make their own.

Total prep time: 30 minutes
Serves: 4

Ingredients:
4 cups finely shredded cooked chicken
3 scallions, thinly sliced
5 large basil leaves, slivered
3 sprigs fresh mint, chopped
1 Tbsp grapeseed or olive oil
Juice of 1 lime (about 2 Tbsp)
Kosher salt and freshly ground pepper

Dipping Sauce:
2 Tbsp light soy sauce
2 Tbsp water
3 Tbsp rice wine vinegar (unseasoned)
1 Tbsp finely chopped fresh ginger root
1 tsp light brown sugar

Accompaniments:
1 head leaf lettuce, separated, washed, and dried (about 10 leaves, green leaf, red leaf, or romaine)
1 red bell pepper, seeded and cut into thin strips
1 large mango, peeled, pitted, and cut into thin strips (see tip at end of recipe)
1 cup bean sprouts
Additional basil and mint sprigs
1 lime, quartered

Directions:
In a medium bowl, toss chicken with scallions, basil, mint, oil, lime juice, and salt and pepper to taste. In a small bowl, whisk together dipping sauce ingredients.

Place about 1/3 cup chicken salad in a lettuce leaf. Top with strips of red bell pepper and mango, bean spouts, basil and mint leaves (if desired), and a squeeze of lime. Roll lettuce up to enclose ingredients and dip into sauce before eating.

Tip: Cutting Mango Matchsticks
(Fine Cooking magazine, by Dabney Gough)

1. Use a very sharp vegetable peeler or a paring knife to remove the skin; try not to take a lot of the fruit along with it. Cut a slice off the stem end to make a stable base and then stand the mango upright on the base.
2. Cut the flesh away from each broad side of the fruit. The pit tapers at the top and bottom, so start a little closer to the center and cut down in a slight arc to follow the contour of the pit. Repeat along the two remaining narrow sides, trying to avoid the fibrous edge of the pit.
3. Slice the fruit lengthwise about 1/8 inch thick.
4. Stack three or four slices flat on the board and cut lengthwise again about 1/8 inch thick.

Hot Apple Quinoa

Ingredients:
1/4 cup dried quinoa
1 teaspoon ground flaxseed
Dash of cinnamon
1/4 cup apple, chopped
1/2 cup water
Handful chopped almonds, walnuts, or pecans
1 Tbsp maple syrup
milk of your choice (unsweeted soy milk is my favorite with this, but use almond or cows if preferred)

Directions:
Boil water in pot with dash of salt. Mix quinoa, ground flaxseed, and cinnamon in a bowl. Add dry mixture to water when boiling. Reduce heat to low. Cover and cook for 10 to 15 minutes. Remove from heat and pour into serving bowl. Top with a handful of nuts, a tablespoon of maple syrup, and stir. Top with milk and enjoy! – Sara

Pan-Fried Tilapia with Red Cabbage Slaw on Greens


1/2 a red cabbage, chopped
1 jalapeno pepper, minced
1/2 red onion, finely diced
3 large cloves of garlic, minced
4 T parsley, chopped

Mix above in a large bowl. Whisk together about 1/2 cup of vegan mayonnaise with about 1/4 cup olive oil and at least a teaspoon of cumin. Pour this over the vegetables and toss. Add salt and pepper as desired.

Heat a little oil in a skillet and cook the tilapia. Fill individual salad bowls with fresh greens, place a piece of fish in each bowl, and top with a heaping serving of slaw.

Salmon Cakes

My lovely sister Dana just turned me on to these cakes. By substituting flax-egg for the actual egg, Adam can actually have these! I adore salmon and pretty much any kind of seafood cake; these don’t have the mashed potatoes that are traditionally included but I think that could be added if the mood struck, to make them more filling. The recipe is from Bon Appetit.

Makes 15 to 18 small cakes; serves 4 to 6

One 1-pound skinless salmon fillet, any pin bones removed, chopped (into 1/4-inch dice
1 large egg white, lightly beaten
3 tablespoons rice flour
2 kaffir lime leaves, chopped, or 6 thin strips (lime zest, chopped
1 tablespoon minced fresh ginger
1 teaspoon wasabi paste
3 tablespoons chopped chervil or flat-leaf parsley
1/4 cup fresh lime juice (from about 2 limes)
1/4 cup soy sauce
2 tablespoons brown sugar
Oil for frying (something neutral, like corn, (canola, or vegetable)

1. Combine the salmon, egg white, rice flour, lime leaves, ginger, wasabi paste, and chopped chervil in a medium bowl.
2. Combine the lime juice, soy sauce, and brown sugar in a small bowl and mix well.
3. Heat the oven to 200°F. Heat 1/2 inch of oil in a large skillet over medium heat. For each cake, place 2 tablespoons of the salmon mixture into the hot oil, and cook for 35 to 45 seconds on each side, or until lightly golden; do not overcook. Drain on paper towels, and keep warm in the oven while you cook the remaining salmon. Serve with the lime juice dipping sauce.

Cooking Notes:
Kaffir lime leaves can be found in specialty markets and in Southeast Asian grocery stores.

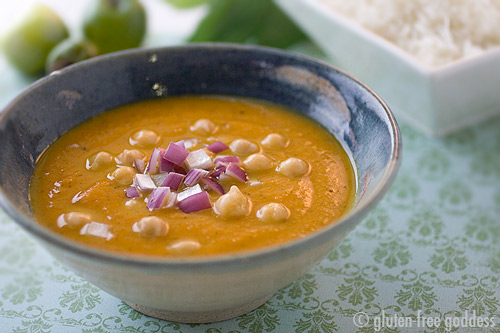
Mulligatawny from Gluten-Free Goddess

This is Karina’s recipe over at Gluten-Free Goddess (she actually has two versions, which I combined just slightly. The other version also has 2 cups of shredded cabbage and more liquid.). She adds jasmine rice and garbanzo beans and diced red onion to her soup. I’m going to ladle it over brown rice with chicken one night and garbanzo beans the next. One commenter on her blog said she subbed butternut squash for the cauliflower, which I think is a nice twist. Or perhaps you could use both?

1 tablespoon olive or avocado oil
1 tablespoon Thai Kitchen Green or Red Curry Paste, or GF curry powder, to taste
1 medium red onion, peeled, diced
4 cloves garlic, minced
4 medium carrots, peeled and diced
1 cup cauliflower florets, chopped
2 stalks celery, chopped
2 medium apples, peeled, cored and diced
1 medium sweet potato, peeled and diced
1 quart light vegetable broth
1 cup coconut milk
Juice from 1 or 2 medium limes, as needed
1 teaspoon raw organic agave nectar or organic raw sugar
Sea salt and fresh ground pepper, to taste
1 14-oz. can chick peas, rinsed and drained
Finely diced red onion, apple, or chopped fresh cilantro, for garnish

You’ll also need:
1 pot of cooked jasmine rice

Heat the olive oil over medium high heat in a medium size soup pot. Add the curry paste and stir briefly to season the oil. Add in the onion, garlic, carrots, celery, apples and sweet potato; stir and cook until softened, about 7 minutes.
Stir in the vegetable broth. Bring to a high simmer and then cover the pot; reduce the heat and simmer the soup, stirring occasionally, until the vegetables are tender, about 20 to 30 minutes.
Add the coconut milk, a squeeze of lime juice and a touch of agave or raw sugar. Stir with love. Taste for seasoning adjustments. Could it use more lime to tart it up a bit? A little salt and pepper?
Adjust the seasonings to your liking. Heat through gently; don’t boil.
Puree the soup with a handheld immersion blender (you could also puree in small batches, covered tightly, in a blender or a food processor; hold the lid on, though as hot soup sputters and expands when it is blended). Return the puree to the soup pot.
Stir in the drained chick peas. Heat through on low heat until serving.
Note: If you prefer a little more texture, you can also puree only half the soup- or mash it lightly with a potato masher until you have the consistency you desire. Then add the chick peas and warm through.
Serve the mulligatawny with a garnish of diced red onion, apple or cilantro. Offer a side of hot cooked jasmine rice.
Add a spoonful of rice to the soup as you eat it. Delicious!
Serves 4.

Read more: http://glutenfreegoddess.blogspot.com/2010/01/mulligatawny-soup-with-jasmine-rice.html#ixzz1BQ0c7oXD

Mom’s Famous Apple Crisp

This is what Adam will be getting for his birthday dessert on Saturday. Apple crisp or pie is by far his most-requested treat. (He also chose to have Indian Spiced Cauliflower and Potatoes with grilled tilapia and a big green salad for Birthday Dinner, which really impressed me! His vegetable repertoire has expanded greatly over the years we’ve been married.)

Anyway, this particular crisp is THE gold standard of crisps, as far as I’m concerned. This is the one I grew up on and no one has beat it yet!

Mix together and spread in 9×13″ baking dish:

6 cups apple pealed and sliced
1 cup sugar
2 tbsp. flour
1 tsp. cinnamon

Mix together:

1 cups whole wheat flour
2 cups white flour
¾ cup sugar
½ cup brown sugar

Cut in 2 sticks butter and sprinkle over apples.

Bake at 400 degrees for 45 minutes.

Walnut Pesto with Fresh Tagliatelle

This is from Lidia’s Italy. On this episode, Lidia made fresh tagliatelle and featured two sauces to dress the pasta with. This one really struck me. I probably won’t be making fresh pasta anytime soon, but luckily I can get it in the refrigerated case at New Seasons from local pasta makers. Lidia stirred all the ingredients together in a big bowl while the pasta was cooking, then smoothed it over the bottom and up the sides a bit. She then lifted the pasta out of the boiling water and right into the bowl without draining, added a few pats of butter on top, and then tossed gently with two spoons. Lastly, she topped with very finely grated reggiano.

Walnut Pesto
Pesto di Noci

serves: 6 main courses

This uncooked dressing, enriched with ricotta and butter, is delicious and quite different from the herb-based pestos I’ve found in other regions. You can blend it together in a bowl while the pasta water is heating up and have a distinctive pasta appetizer or main course in minutes. To retain its vibrant, fresh flavors, it is important not to cook the pesto, just toss it with the pasta and serve.

For the Pesto
2 plump garlic cloves, peeled
1 teaspoon kosher salt
2 cups walnut halves, or pieces, toasted
1½ cups ricotta, preferably fresh
6 tablespoons extra-virgin olive oil
6 tablespoons Grana Padano, freshly grated, or more for passing
3 tablespoons fresh Italian parsley, chopped
freshly ground black pepper, to taste
3 tablespoons butter, softened

For the Pasta
1 pound tagliatelle

Put the walnuts and garlic in the food processor, and pulse until the nuts are chopped into very tiny bits (but don’t grind them to a powder). Scrape the ground nut-garlic mixture into the large bowl, and stir in the ricotta, olive oil, grated cheese, parsley, salt, and pepper, until thoroughly blended. When the pesto is ready and the water is boiling, drop all the pasta into the pot at once, and stir to loosen and separate the strands. Cover the pot, and over high heat return the water to a boil rapidly. Set the cover ajar, and cook the pasta until the tagliatelle are perfectly al dente. Working quickly, lift out the tagliatelle with a spider and tongs, and drop into the bowl with the dressing. Drop the soft butter in dollops on the hot pasta, and toss until all the strands are nicely coated with the pesto- if the dressing is too thick, loosen it with a bit of hot water from the pasta pot as you toss. Serve immediately in warm bowls, with more grated cheese at the table.

Cuban Black Beans

Cook black beans according to recipe below. When cooked, add several heaping tablespoons of recaito and a few chopped ajices dulces, and stir. This is traditionally served with white rice, but I made long grain brown rice with it and it was delicious.

Black Beans
Frijoles Negros
Most people soak their beans before cooking them, but you don’t have to. It takes longer to cook them, but they are still delicious. If you’d like to soak your beans before cooking them, go ahead.
Makes about 4 cups

1 pound black beans
1 smoked ham hock
2 bay leaves

Put the beans and ham hock in a medium saucepan and pour in enough water to cover them by 2 inches. Toss in the bay leaves and bring the water to a boil. Adjust the heat so the water is boiling gently and cook the beans, skimming off any foam that rises to the top, until tender, about 2 hours. Keep an eye on the beans; they should always be covered by liquid. When the liquid meets the level of the beans, top it off with a 1/2-inch or so of cold water.

Toward the end of cooking, ease up on the liquid you add; the goal is to have the beans barely covered with liquid by the time they’re tender.

Recaito

There really is no translation for this mixture of onion, garlic, peppers and green herbs. Recao is culantro (see below) in Puerto Rican-speak, so this seasoning is nicknamed recaito, or “little culantro.” Recaito is used for dishes like Cuban black beans or Puerto Rican Style Pot Roast, where you don’t want the color or extra liquid that you have in a sofrito. Culantro is the defining flavor. Recaito, like sofrito, can get you out of any kitchen emergency. It pays to make extra (which this recipe does) and portion it out for the freezer.
Makes about 1 ½ cups

1 medium Spanish onion, cut into big chunks
8 cloves garlic, peeled
6 ajicitos dulces (see recipe for Sofrito) or 1 cubanelle peppers, cored, seeded, and cut into chunks
4 leaves culantro (if you can’t find culantro, increase the amount of Iajicitos or cilantro by half)
6 big sprig cilantro, stems and all, coarsely chopped (about 1 cup packed)
 

Place the onion and garlic in the work bowl of a food processor fitted with the metal blade. With the motor running, add the remaining ingredients, one at a time and process, until the mixture is smooth. Set aside the amount you need for the recipe you’re preparing. Pack the remaining recaito in ½-cup portions in sealable plastic bags and store in freezer.

Sofrito (Daisy Martinez’s version)

From Daisycooks.com:

There is no other recipe I could have chosen to open with. This is the one indispensable, universal, un-live-withoutable recipe. Having said that, it is incredibly easy to make with ingredients you can find at the supermarket. And if you can’t find all the ingredients I list below see the note that follows for a very simple fix. What sofrito does is add freshness, herbal notes and zing to dishes — you can do that with the onion, garlic, bell pepper, cilantro and tomato alone.

In my house, sofrito makes its way into everything from yellow rice, black bean soup, sauce for spaghetti and meatballs to braised chicken and sautéed shrimp. Not only that, it freezes beautifully, so in about In 10 minutes you can make enough sofrito to flavor a dozen dishes. I’m telling you, this stuff does everything but make the beds. Try out your first batch of sofrtio in the recipes you’ll find throughout this site, or add sofrito to some of your own favorite dishes that could use a little boost. You will change the way you cook. I guarantee it.

Makes about 4 cups.
If you can’t find ajices dulces or culantro, don’t sweat. Up the amount of cilantro to 1 ½ bunches.

2 medium Spanish onions, cut into large chunks
3 to 4 Italian frying peppers or cubanelle peppers
16 to 20 cloves garlic, peeled
1 large bunch cilantro, washed
7 to 10 ajices dulces (see note below), optional
4 leaves of culantro (see note below), or another handful cilantro
3 to 4 ripe plum tomatoes, cored and cut into chunks
1 large red bell pepper, cored, seeded and cut into large chunks
 

Chop the onion and cubanelle or Italian peppers in the work bowl of a food processor until coarsely chopped. With the motor running, add the remaining ingredients one at a time and process until smooth. The sofrito will keep in the refrigerator for up to 3 days. It also freezes beautifully. Freeze sofrito in ½ cup batches in sealable plastic bags. They come in extremely handy in a pinch. You can even add sofrito straight from the freezer to the pan in any recipe that calls for it in this book.
Pantry Notes: Ajices Dulces, also known as cachucha or ajicitos are tiny sweet peppers with a hint of heat. They range in color from light to medium green and yellow to red and orange. They add freshness and an herby note to the sofrito and anything you cook. Do not mistake them for Scotch bonnet or Habanero chilies (which they look like)–those two pack a wallop when it comes to heat. If you can find ajicitos in your market, add them to sofrito. If not, up the cilantro and add a pinch of cayenne pepper. Culantro is not cilantro. It has long leaves with tapered tips and serrated edges. When it comes to flavor, culantro is like cilantro times ten. It is a nice, not essential addition to sofrito. (See Sources for both the above.)

Cuban Black Bean Soup (Sopa de Frijoles Negros al Estilo Cubano)

Another recipe from Daisy Martinez at Daisy Cooks! Aired on OPB’s Create show on Saturday, Jan. 8 2011.

I like a little heat in my black bean soup, so I add a tiny piece of Scotch bonnet chili pepper like I do in the previous soup. If you don’t, leave it out. This is such a favorite of mine, that a bowl of this and a little crusty bread is a meal. I also think of this as my “ice cream sundae” soup–fill bowls with the soup and let people top them as they like.

Black Beans (recipe follows)
Two 14 1/2-ounce cans chicken broth
1/2 cup Sofrito (see “Staples”)
1/2 cup canned Spanish-style tomato sauce
3 tablespoons alcaparrado or chopped pimiento-stuffed olives
1 tablespoon fine sea or kosher salt
Healthy dose freshly ground black pepper
1/4 Scotch bonnet or jalapeño pepper
Any or all of the following “sundae toppings”
Cooked white rice
Chopped red or white onion
Chopped cilantro
One-quarter of a Scotch bonnet or jalapeno pepper, optional
Sour cream
Olive oil
 

1. Make the black beans.

2. Stir the chicken broth, sofrito, tomato sauce, alcaparrado or olives, salt, pepper, and chili pepper into the black beans. Bring everything to a boil over medium-high heat. skim off any foam that rises to the surface. Continue boiling until the soup is nice and thick, with just enough liquid to cover the beans. Pull the pot off the heat and let it sit 5 to 10 minutes so the beans soak up a little more of the liquid. Serve hot, ladled into warm bowls. Pass the toppings you have prepared.

Ropa Vieja

I was first introduced to the mouth-watering deliciousness of Cuban cuisine while I was living in LA. I met Barbie in a history class and we became great friends. She had come to the States as a small child with her parents, refuges from Cuba, and I spent quite a bit of time at their house eating her mother’s amazing cooking. I never saw how she did it, however, so this recipe is from Daisy Cooks! on OPB’s Create show. Daisy Martinez specializes in Latin cuisine, and when I saw this dish I knew that’s what we’d be having for dinner! I’m also going to post her recipes for black bean soup and moros y cristianos (Moors and Christians), which is black beans and white rice – a total Cuban staple.

From Daisy’s website, daisycooks.com:

This dish gets its name from the shredded texture of the beef, which resembles clothes so worn they’re falling apart. If you’re Cuban, please don’t come after me for using chuck steak instead of the more traditional flank steak. Both are delicious, but I prefer the texture of the shredded chuck to that of flank. Other than that, this is a traditional version of a Cuban standard, which will taste better the next day.
Makes 6 servings

One 2 ¼ to 2 ½ pound chuck roast or two 1 ¼ pound flank steaks 2 teaspoons fine sea or kosher salt, plus more for seasoning the beef
Freshly ground pepper
Onion powder
3 tablespoons canola oil
½ cup Sofrito
¼ teaspoon ground cumin
Two 8-ounce cans Spanish-style tomato sauce
1 ½ cups water
3 tablespoons alcaparrado or coarsely chopped pimiento-stuffed olives
2 bay leaves
4 celery stalks, with leaves, cut into ¼-inch dice
3 medium carrots, trimmed and cut into ¼-inch dice
1 cup fresh or frozen green peas
 

1. Preheat the oven to 350° F. Pound the chuck roast or flank steaks out with a heavy meat mallet until about ½ inch thick. Season both sides of the beef generously with salt, pepper and onion powder.

2. Heat the oil in a large, oven-proof, heavy skillet over high heat until rippling. Add the beef and cook it until well browned on both sides, about 10 minutes.

3. Drain or spoon off most of the fat from the pan. Stir in the sofrito, 2 teaspoons salt, and the cumin and bring to a boil. Depending on how much oil was left in the pan, you may have to add a little olive oil to give the mix a nice, creamy texture. Stir in the tomato sauce, water, alcaparrado or olives, and bay leaves. Bring to a boil, cover the dish and bake until the meat pulls apart easily with a fork, about 2 ½ hours. Let stand in the sauce until cool enough to handle.

4. Shred the meat coarsely by hand or using two forks. Return it to the sauce and add the celery and carrots. Bring to a simmer over low heat and cook until the vegetables are tender, about 10 minutes. Stir in the peas and cook a few minutes more. Watch the liquid as it cooks, and add more broth of water as needed.

Spaghetti with Chickpeas

It was the chickpeas and pancetta that got me. I love anything you can add crispy pork to, and chickpeas are an all-time fave. Plus it’s pasta…

Debbie recommends double-ing the amoung of sauce, or halving the amount of pasta (which would my choice, since usually cooking for two). The pic below is of the recipe as written.

15 ounces canned chickpeas, rinsed and drained or about 2 cups, freshly cooked chickpeas
1/2 cup chicken stock
5 tablespoons extra-virgin olive oil
1/2 cup pancetta, diced (a little shy of 2 ounces)
1 medium onion, thinly sliced
4 cloves garlic, thinly sliced
Pinch chile flakes
1 14-ounce can tomatoes, chopped
10 to 15 basil leaves
Salt to taste
1 pound spaghetti
Freshly grated Parmesan cheese to taste

Set 1/3 cup of chickpeas aside. In a blender or food processor, combine remaining chickpeas with chicken stock and pulse a few times until chickpeas are chopped.

Place a large pot over medium heat and add olive oil and diced pancetta. Sauté for 3 to 4 minutes until lightly browned; a splatter screen will make your stove look better than mine did after this. Add onions, garlic, and chile flakes. Continue cooking until onions and garlic are translucent, about 5 to 8 minutes.

Add chickpea mixture, tomatoes, and basil, and let simmer for 20 minutes. Season to taste with salt. While sauce is cooking, bring a large pot of salted water to a boil. Add spaghetti, and cook until al dente, or tastes like it could use an additional minute’s cooking time. Reserve one cup of pasta water and drain the rest. Toss pasta with chickpea sauce, reserved chickpeas and half of the reserved pasta water until evenly coated and heated through, about one minute. If sauce still feels too thick add reserved pasta water as needed. Season again, as needed, and serve with grated Parmesan to pass.

Pumpkin Polenta with Tomatilla-Avocado Salsa

I put tilapia with this, as well. Grilled or fried or whatever. Tilapia is my go-to protein when I don’t want something to interfere too much with another flavor. I think a rotisserie chicken (or grilled or roasted chicken) would work well, also. Mostly I’m just enamored of putting pumpkin (which I adore) into polenta (which I also adore, especially with a small pat of Earth Balance butter on top). Major kudos to Karina, a Gluten Free Goddess, from whom this recipe springs.

3 cups fresh water
Pinch of sea salt
1 cup Bob’s Red Mill Gluten-Free Polenta
1 14-oz. can organic pumpkin puree
2/3 cup coconut milk
2-3 tablespoons vegan butter

1 tablespoon raw organic agave nectar or pure maple syrup
Pinch of nutmeg

Heat the water in a deep saucepan until boiling and add a pinch of sea salt, to taste. Pour the polenta into the simmering water, stirring with a whisk as you pour. Continue to whisk for a minute or two as the polenta cooks and adjust the heat to medium-low heat, so that the mixture gently simmers but does not cook too quickly- you don’t want to scorch it. Keep an eye on it and stir frequently to keep it from sticking. When the polenta has absorbed most of the water, add in the pumpkin puree and whisk to combine. Add in the coconut milk, vegan butter, agave and a pinch of nutmeg, and stir again. The polenta should be ready in roughly 20 to 30 minutes. It should be tender to the bite, not gritty. If it isn’t soft enough for you, add more coconut milk and cook it a little longer.

Serve in soft mounds with a topping of salsa fresca (recipe follows) or more vegan butter and maple syrup.

Sprinkle with roasted shelled pumpkin seeds.

Makes four main dish servings, or six side dish servings.

Tomatilla-Avocado Salsa

Salsa fresca is so easy. Chop up your favorite fresh salsa ingredients as the polenta is cooking. Cover and chill. Let the flavors mingle and get happy. If you’re using avocado (so good with pumpkin!) add it in just before serving, to keep it from turning dark.

3 tomatillos
1/2 orange or yellow bell pepper
1 Anaheim chile pepper
1 fresh lime
A dash of extra virgin olive oil
A drizzle of raw organic agave nectar
Sea salt, to taste
A handful of fresh chopped cilantro
1 small avocado

Remove the papery skins from the tomatillos and wash the stickiness off with produce soap and water. Roughly chop. Toss into a bowl.

Wash and halve the bell pepper; seed and chop one half. Add to the bowl.

Stem and clean the chile pepper; dice. Add it in.

Drizzle the mix with fresh squeezed lime juice, olive oil and agave nectar. Season with sea salt, to taste. Add in fresh chopped cilantro and stir to combine.

Cover and chill till serving.

Just before serving, peel and pit the avocado, dice it and add the avocado to the salsa.

Makes four servings.

Karina’s Notes:

If you enjoy cheese, this polenta would be delicious served with grated vegan cheese or fresh crumbled goat cheese.

Add protein to the plate with cooked black beans. Or add black beans to the salsa recipe below.

To make polenta ahead of time: cook till done and spread the warm polenta into a cake pan and cool. Cover and chill. Slice cooled polenta into wedges. Broil wedges brushed with olive oil till sizzling. Top with salsa or grated vegan cheese.

Broiled Salmon with Marmalade and Wasabi

My new favorite way to make salmon – so fast and easy and so amazingly delicious! The only thing I changed is that I use half the amount of marmalade she calls for – the first time, I had marmalade oozing all over the plate, coating my roasted baby red potatoes and green beans as well as my salmon. I love marmalade as much as the next Anglophile, but not on potatoes and green beans. The heat of the wasabi and dijon are perfect complements to the marmalade. And seriously, this is ready in like 8 minutes.

 two salmon fillets, preferably wild king salmon from Alaska
 one-half cup orange marmalade (splurge and buy the best, please)
 one tablespoon Dijon mustard
 one teaspoon wasabi (or, buy wasabi/Dijon mustard)
 one teaspoon fresh, minced garlic
 one-half teaspoon salt
one-half teaspoon cracked black pepper
one-half teaspoon fresh grated ginger

Preheat the oven to broil. Place the salmon on a tin-foil-covered baking sheet.

Mix all the ingredients, besides the salmon, in a small bowl, and stir them well. Spoon half the marmalade delight over the salmon. Use a pastry brush to coat the salmon.

Put the salmon under the broiler for six minutes, or until it’s bubbly. Immediately brush the remaining marmalade mixture over the salmon and broil for a remaining two minutes. The inside will still be a slightly darker pink than the rest of the fish, but the salmon is now succulent and ready to eat.

Bacon Spinach Risotto

In a word – OMG. My only word of advice is to use thin bacon, instead of the thick strips that I had on hand that didn’t get as crispy as I would have liked. This is so decadent and totally egg, dairy, and gluten free (if you use olive oil and leave out the parm at the end)! AND, I also happened upon a bottle of Woop Woop shiraz and it was great. Especially as an everyday wine.

5 cups of vegetable or chicken stock (out of homemade stock, I used Pacific organic chicken stock)
1/4 cup of butter
1 red onion, diced
2 cloves of garlic, minced (honestly, I used three or four, but I’m a garlic girl)
1 1/2 cups of bacon, shredded (I don’t get the cup measurement. I used about six pieces)
2 cups of arborio rice
large pinch of nutmeg
2 tomatoes, chopped (I used heirloom tomatoes from the farmers’ market)
6 ounce of spinach (I used an entire bunch, because I love spinach)
1/2 cup of freshly grated Romano cheese

1. Pour the stock into a large saucepan and bring it to a boil. Reduce the heat until the stock is gently simmering.
2. Meanwhile, melt the butter in large skillet and gently fry the onion, garlic, and bacon for 2 to 3 minutes until the onion has softened but not browned and the bacon is sealed. Stir in the rice and cook, stirring all the while, for two minutes until the rice is well cooked and starting to toast.
3. Add a ladleful of the stock to the pan and cook gently until the stock is absorbed. STIR CONTINUOUSLY. Continue to add the stock in small quantities until half of it has been used and the rice is creamy. Season well and add the nutmeg and tomatoes.
4. Continue to add the stock until the risotto becomes thick but not sticky. This should be about 25 minutes.
5. Stir the spinach into the risotto for two to three minutes, then add the cheese at the last moment. Serve and eat immediately.

TIPS:

° Do not wash the rice before you cook it. This eliminates half the starch, and thus half the creaminess.
° Choose a wide-mouthed, large pan to cook the risotto. Don’t make the mistake of using a pan just slightly larger than the recipe, or else you’re going to have rice stuck to your stove and your pants.
° Find an even heat and keep it there the entire time you are cooking. I cooked mine on medium high, and it turned out beautifully. But you know your stove better than any cookbook (or blog author) could. Go by your instinct.
° Stir and stir and stir some more. Slowly. Don’t leave. Don’t wish for it to be over. Don’t complain that your biceps are aching. Throw yourself into it fully. You never know—you just might reach enlightenment by stirring.
° Enjoy with some lovely red wine. Try Woop Woop, for the pure pleasure of the name alone.

Coconut Rice

From Gluten-Free Girl and the Chef. Shauna says she makes this as an everyday meal with either a fried egg on top, or sauted greens, or, as I’ve been doing it, with grilled chicken and avocado. It’s totally delicious. This week I had leftovers and brought it to work for lunch, with some black beans tossed in. It really does make a difference to soak the rice for an hour before – in fact, it tasted so much less “healthy” that I ate it like it was white rice and sort of waddled around for the rest of the evening – it’s really filling! I also use twice the amount of curry that Shauna calls for below – 1 tsp instead of 1/2 tsp.

I even went out and got a new rice cooker for this recipe (old one broke awhile back). Now I’m inspired to throw all sorts of things in there as the rice cooks – plain brown rice is SO last season.

My brother and I used to tease my father that he had a lifetime subscription to Somewhere Magazine. Whenever we asked him where he had read a statistic that proved his point, or a story that seemed too far-fetched to be true, he always said, “Oh, somewhere.”

Karma’s coming back. I cannot for the life of me remember where I read the tip recently that soaking brown rice for at least an hour makes it far more fluffy and less “good-for-you” tasting. Somewhere. Still, you should do this too. Somewhere Magazine was right.

The directions here are for a rice cooker. That’s how we cook our rice now. I haven’t made a pot of rice on the stove in at least 3 years. If you would like to make this on the stove, then use whatever method you traditionally use.

Or buy a rice cooker.

2 cups brown basmati rice
1/2 can (7 ounces) coconut milk
juice of 1 medium-sized lime
2 tablespoons coconut oil
1/2 teaspoon Madras curry powder
1/2 teaspoon powdered ginger
1/2 teaspoon kosher salt
1 teaspoon cracked black pepper

Soaking the rice. Soak the rice in 4 cups of cool, fresh water. Let it sit for at least 1 hour, preferably longer, if you can. This helps to remove some of the starchiness from the rice. Pour the rice into a large strainer, draining out all the water.

Cooking the rice. Pour the rice into the rice cooker. Add the coconut milk, lime juice, coconut oil, curry powder, ginger, salt, and pepper. Stir it all well. Add 3 1/2 cups cool, fresh water. Stir it all up. Close the lid. Turn the rice cooker to the brown rice setting, then turn it on.

Spicy Cauliflower with Sesame

Another one from 101 Cookbooks – one of my favorite sites for veggies. Heidi makes this as a main dish with either paneer or tempeh tossed in for protein, but I tend to grill or roast some tilapia on the side.

1 1/2 tablespoons extra-virgin olive oil or clarified butter
1 teaspoon cumin seeds
2 medium yellow onions, finely sliced
a pinch of turmeric
fine grain sea salt

1 medium / 12 oz cauliflower, thinly sliced

4 dried red chiles, stemmed and halved
1-2 teaspoon sesame seeds, lightly toasted
1 garlic clove, grated

4 cm / 1 1/2-inch piece of fresh ginger, peeled and finely grated

1-2 green jalapeno chiles, seeds removed, finely chopped
2-3 tablespoons chopped fresh cilantro / coriander

Heat the oil in a large skillet over medium-high heat, add the cumin seeds and cook until they begin to crackle, just 30 seconds or so. Stir in the onions, along with the turmeric and a few pinches of salt. Cook, stirring often, until the onions caramelize a bit and turn lightly golden, roughly 7 – 10 minutes. Add the red chiles, sesame seeds, garlic, and half of the ginger. Continue to cook for another minute. Add the cauliflower and stir well. Cover the pan and cook the cauliflower over low-medium heat for 3 – 5 minutes, until just tender.

When the cauliflower is nearly cooked, remove the lid, increase the heat, and stir in the green chiles and remaining ginger. Salt to taste, sprinkle with cilantro and enjoy.

Adapted from Reza Mahammad’s lovely cookbook, Rice, Spice and all

Creamy Mashed Potatoes with Kale and Olive Oil

I didn’t realize what a long time it’s been since I posted anything until recently, when my kitchen became cluttered up with increasing numbers of scraps and print-outs of recipes, and as I hate paper kitchen clutter, I suddenly remembered my original purpose here – to combine in one place all my favorite recipes from the various blogs and cookbooks I read, so that when planning my weekly menus I have a nice long list of everything we’ve loved so far. And no papers! So here we go.

This one is from 101 Cookbooks. Heidi’s notes are below.

For this recipe, be sure to wash the kale well (or spinach, or chard) – dirt and grit hides in the leaves. I don’t like floppy leafiness in my potatoes, so I chop the kale quite finely. If you stir the kale in too much it can lend a slight green cast to your potatoes, so i just barely stir it in right before serving. Also, on the potato front – feel free to use unpeeled potatoes if you like something a bit more rustic (and nutritious). I picked up some yellow-fleshed German Butterball potatoes at the market last week and they added the visual illusion that the mashed potatoes were packed with butter. Didn’t miss the real thing a bit.

3 pounds potatoes, peeled and cut into large chunks
sea salt
4 tablespoons extra virgin olive oil
4 cloves garlic, minced
1 bunch kale, large stems stripped and discarded, leaves chopped
1/2+ cup warm milk or cream
freshly ground black pepper
5 scallions, white and tender green parts, chopped
1/4 cup freshly grated Parmesan, for garnish (opt)
fried shallots, for garnish (optional)

Put the potatoes in a large pot and cover with water. Add a pinch of salt. Bring the water to a boil and continue boiling for 20 minutes, or until the potatoes are tender.

 Heat two tablespoons of olive oil in a large pan or skillet over medium-high heat. Add the garlic, chopped kale, a big pinch of salt, and saute just until tender – about a minute. Set aside.

 Mash the potatoes with a potato masher or fork. Slowly stir in the milk a few big splashes at a time. You are after a thick, creamy texture, so if your potatoes are on the dry side keep adding milk until the texture is right. Season with salt and pepper.

 Dump the kale on top of the potatoes and give a quick stir. Transfer to a serving bowl, make a well in the center of the potatoes and pour the remaining olive oil. Sprinkle with the scallions, Parmesan cheese, and shallots.

Serves 6.

Swiss Cheese Fondue

I just purchased my first fondue pot and I’m more than a little excited about the possibilities. The immediate excuse was wanting to make chocolate fondue for the friends we had over Friday night, (which did not turn out, sadly, so more research needed there), but my heart rejoices at the thought of the many lobster tails I’ll be dipping in simmering broth over the years. Adam has requested traditional cheese, however, as our inaugural entree, so here it is.

This is the cheese fondue I grew up eating. I don’t know where Mom got the recipe originally, but I have fond memories of the whole lot of us bent over one pot, eight forks vying for prominence. Mom usually gave us multigrain bread as the dipping agent, but due to ideas born courtesy of Blue Hour in Portland, I like to use green apples, blanched asparagus, and small steamed yukon potatoes as well.

1 clove garlic
¾ cup dry white wine
4 cups (1 lb.) shredded natural Swiss cheese
2 Tblsp flour
1/8 tsp ground nutmeg
¼ tsp salt
Dash pepper
1 – 2 Tblsp Kirsch, if desired (I’ve never used this)
1 loaf French bread

Rub inside of saucepan or fondue dish with cut clove of garlic. Add wine and heat until bubbly. Combine cheese, flour, nutmeg, salt and pepper. Add about ¼ cup of cheese mixture to wine; stir vigorously. Continue adding cheese in small amounts and stirring until all the cheese is melted and mixture is thoroughly blended. Stir in Kirsch, if using. Keep hot while serving with bite-sized pieces of bread to dip into fondue.

Blue Cheese and Red Potato Tart

1 Savory Tart Shell, below, or recipe of your choice, in a 9-inch tart pan and ready to fill
1 pound small red potatoes, scrubbed and cut into 1/4-inch slices
1 cup heavy cream
1 large egg yolk
1/4 pound blue cheese, crumbled (about 3/4 cup)
1 tablespoons finely chopped herb or herbs of your choice, such as a mixture of thyme and rosemary
Fine sea salt for sprinkling

Preheat oven to 350°F. In a medium saucepan, cover potato slices with water by two inches. Simmer, uncovered, until tender, about 10 minutes. Drain. If the potatoes don’t seem very dry, pat them dry with towels.

Arrange potato slices, overlapping slightly, in concentric circles around the tart pan. Sprinkle blue cheese over potatoes. Whisk cream and egg yolk together and pour into tart shell, then sprinkle tart with herbs of your choice and salt.

Bake tart on a baking sheet until bubbling and golden brown, about 45 to 50 minutes. Cool in pan on rack and serve warm or cold. With a big green salad, for balance.

Savory Tart Shell

1 1/4 (5 1/2 ounces) cups flour
1 tablespoon plus 2 teaspoons cornstarch
1/4 teaspoon salt
6 tablespoons (3 ounces) butter, diced
1 large egg

In a large bowl, combine the flour, cornstarch and salt. Cut the butter in with a pastry blender, fork or two knives until it is in very tiny bits. Add one egg and mix with a fork until a dough forms. If this does not happen easily, toss it out onto a counter and knead it together. This dough is rather tough but with a little elbow grease, it does come together nicely.

This dough can also be made a food processor, or in a stand mixer.

On a lightly floured surface, roll the dough out to a 12-inch circle. Place the dough in a 9-inch pie plate or tart pan and press to remove any air bubbles. Level the edges, and refrigerate for 30 minutes. Proceed with a filling of your choice, no parbaking required.

From Smitten Kitchen, adapted from Gourmet: http://smittenkitchen.com/2010/06/blue-cheese-and-red-potato-tart/#more-6468

Gazpacho al Estilo de Tichi (from Jaleo)

The first time I visited Jaleo was about 10 years ago, and I had come out to DC to see Dana, who I think was living in that little dairy ice box place. We met up with Lori for a day of sightseeing on the mall; our wanderings made us hot and hungry and we stumbled upon this lapis-blue-tiled Mediterranean oasis of tapas awesomeness. I remember feeling incredibly grown-up and sophisticated, sitting there at the bar (drinking lemonade) without parents or other restraints.

Years later when I actually lived in DC, I managed to track this place down and it was every bit as good as I remembered. Since then I’ve been often with friends and have a lot of great memories (Becky’s going away party before she left for Tanzania! Dana’s 30-birthday sister lunch!).

Chef Jose Andres makes the best gazpacho EVER and he has kindly disseminated the recipe. Dana says she doesn’t use the full amount of olive oil and it is still awesome; I experiment with the amount each time I make it, depending on how fattening I am feeling that day. It makes 4 main-course servings or 8 first-course servings.

For the gazpacho:
10 (2 pounds) plum tomatoes, quartered
1 medium cucumber, peeled and cut into chunks
1/2 green bell pepper, coarsely chopped
1 clove garlic
2 tablespoons sherry vinegar, or more to taste
1/2 cup water
3/4 cup extra-virgin olive oil, preferably Spanish
1 to 2 teaspoon salt

For the garnish:
3 tablespoons extra-virgin olive oil, preferably Spanish
1 slice rustic white bread
12 cherry tomatoes, halved (or quartered if large)
1 medium cucumber, peeled and cut into 1/2-inch cubes
4 pearl onions, quartered and separated into segments
1 tablespoon sherry vinegar
Sea salt
4 chives, cut into 1-inch pieces

For the gazpacho: In a blender or food processor, add the tomatoes, cucumber, green bell pepper, garlic, sherry vinegar and water and blend until the mixture becomes a thick liquid. Taste for acidity (this will vary with the sweetness of the tomatoes) and add more vinegar if necessary. Add the oil and salt. Blend again briefly to thoroughly incorporate the oil. Pour through a fine-mesh strainer into a pitcher or large bowl. Cover and refrigerate until cool, at least 30 minutes.

For the garnish: Meanwhile, in a small saute pan over medium-high heat, add 1 tablespoon of the oil. When it is shimmering, add the bread and cook until golden on both sides, about 2 minutes. Break the bread into small pieces to form about 16 croutons and set aside.

To assemble the soup, distribute the croutons, cherry tomatoes, cucumber and onions evenly among the bowls and drizzle with sherry vinegar and the remaining olive oil. Sprinkle with sea salt and chives. At the table, pour the chilled gazpacho over the garnish. Serve immediately.

Recipe Source:
Adapted from “Tapas: A Taste of Spain in America,” by Jose Andres (Clarkson Potter, 2005, $35).

206 calories, 21g fat, 3g saturated fat, n/a cholesterol, 297mg sodium, 6g carbohydrates, 2g dietary fiber, n/a sugar, 1g protein.

Blueberry Ginger Granita

Gourmet, May 2002
I had this for the first time at a dinner party Dana gave at the Royal Street house in Virginia. (It’s amazing how many of my food-related memories have to do with that girl.) I think I spilled some of it on her newly upholstered couch, the result of too much red-wine-induced gaiety.
Yield: Makes about 4 cups or 4 servings
Active Time: 15 minutes
Total Time: 4 1/2 hours
2 T chopped peeled fresh ginger
1/2 c. superfine granulated sugar
3/4 lb. blueberries (2 1/2 c.), thawed if frozen
3/4 c. water
2 tsp fresh lime juice
Finely grind ginger with sugar in a food processor. Add blueberries and puree until smooth. Force puree through a fine sieve into an 8- to 9-inch baking pan, pressing hard on solids. Discard solids. Stir in water and lime juice.
Freeze, stirring and crushing limps with a fork every hour, until evenly frozen, about 4 hours total. Scrape with a fork to lighten texture, crushing any lumps.
Serve immediately or freeze, covered, up to 3 days.
Epicurious.com Conde Nast Digital, Inc. All rights reserved.

Lemony Zucchini Goat Cheese Pizza

1 batch Simplest Pizza Dough or a store-bought pizza dough that will yield one small (approx. 11 to 12 inches across), thin pizza
1 lemon
4 ounces goat cheese, at room temperature
Few leaves of fresh basil, cut into thin slivers
1/2 medium yellow zucchini, sliced as thinly as you can pull off with a knife or your mandoline (I went for 1/8-inch thick with mine)
1/2 medium green zucchini, sliced as the same as above
Drizzle of olive oil
Salt and pepper to taste

Preheat your oven to 450 degrees. Roll your pizza dough into a thin 12-inch circle and lay it on a tray or stone that has been dusted lightly with cornmeal.

In a small bowl, stir together the goat cheese with the juice of half your lemon. Season it with salt and freshly ground pepper, and spread it over your pizza dough. Scatter fresh basil slivers over the cheese.

Arrange your zucchini coins in concentric circles over the goat cheese spread, overlapping them slightly. You can alternate their colors, if you’re feeling fancy. Squeeze the juice of the second half of your lemon on top of you zucchini, then drizzle with olive oil and finish with more salt and freshly ground black pepper.

Bake in preheated oven for 10 to 15 minutes (your baking time will vary, so please watch carefully), or until the edges of your pizza are golden brown and the zucchini looks roasted and a little curled up at the edges. Serve with a green or even simple tomato salad and a glass of crisp white wine.

Source: http://smittenkitchen.com/2009/07/lemony-zucchini-goat-cheese-pizza/

Simplest Pizza Crust

Makes enough for one small, thin crust pizza. Double it if you like your pizza thick and bready.

1 1/2 cups flour (can replace up to half of this with whole wheat flour)
1 teaspoon salt
3/4 teaspoon active dry yeast
1/2 cup lukewarm water (may need up to 1 or 2 tablespoons more)
1 tablespoon olive oil

Stir dry ingredients, including yeast, in a large bowl. Add water and olive oil, stirring mixture into as close to a ball as you can. Dump all clumps and floury bits onto a lightly floured surface and knead everything into a homogeneous ball.

If you are finding this step difficult, one of the best tricks I picked up from my bread-making class is to simply pause. Leave the dough in a lightly-floured spot, put the empty bowl upside-down on top of it and come back in 2 to 5 minutes, at which point you will find the dough a lot more lovable.

Knead it for just a minute or two. Lightly oil the bowl (a spritz of cooking spray perfectly does the trick) where you had mixed it — one-bowl recipe! — dump the dough in, turn it over so all sides are coated, cover it in plastic wrap and leave it undisturbed for an hour or two, until it has doubled in size.

Dump it back on the floured counter (yup, I leave mine messy), and gently press the air out of the dough with the palm of your hands. Fold the piece into an approximate ball shape, and let it sit under that plastic wrap for 20 more minutes.

Sprinkle a pizza stone or baking sheet with cornmeal and preheat your oven to its top temperature. Roll out the pizza, toss on whatever topping and seasonings you like. (I always err on the side of skimpy with toppings so to not weight down the dough too much, or if I have multiple toppings, to keep them very thinly sliced.)

Bake it for about 10 minutes until it’s lightly blistered and impossible to resist.

Source: http://smittenkitchen.com/2007/01/pizza-and-the-limits-of-diy/

Pasta Puttanesca

I just can’t stop pilfering recipes from Smitten Kitchen. Seriously, who is this person and how did she get to be that way? I wish she lived near me. Also Dana. She and Dana and I would drink alot of wine and form a coven of awesomeness.

Pasta Puttanesca actually means something like “whore’s pasta” or “prostitute’s pasta” or something like that. I don’t know why and stories vary, although I like Deb’s idea that it was traditionally prepared by women who wanted to keep their meal prep short so their evening could move on to “other things.” (I’m sure the MoTH would like that one best, as well). Regardless, I’m happy to keep prep short because there are currently Mad Men episodes to watch and hot tubs to sit in and electric guitars to practice. So here’s the recipe:

8 ounces regular whole-wheat thin spaghetti, vermicelli or angel hair
1 tablespoon extra-virgin olive oil
2 cloves garlic, minced
1/3 cup chopped flat-leaf parsley
1/4 cup pitted chopped Spanish or Greek olives
2 tablespoons capers
1 teaspoon anchovy paste
1 tablespoon fresh oregano leaves or 1 teaspoon dried
1/8 teaspoon crushed red pepper flakes
1 (14-ounce) can diced tomatoes
3/4 cup chopped fresh arugula
1/4 cup grated Parmesan

Bring a large pot of salted water to a boil, add pasta and cook according to the directions on the package.

While the pasta is cooking, heat the oil in a large skillet over a medium flame. Add the garlic and saute until fragrant, about 1 minute. Add the parsley, olives, capers, anchovy paste, oregano and crushed red pepper to the skillet, and saute for 2 minutes more. Add the tomatoes and simmer for about 5 minutes. Stir in the arugula and simmer for 1 minute more, until the greens wilt slightly.

When the pasta is done, drain it and add it to the skillet, tossing it with the sauce to combine. Top with grated cheese.

Asparagus with Chorizo and Croutons

Browsing through Smitten Kitchen’s Spring recipes, I stumbled up this. It struck me as very odd at first, but I like chorizo with beans, and I like asparagus, and croutons, and as Joey said in one memorable Thanksgiving “Friends” episode when Rachel misread her recipe and added ground beef to her trifle, “Jam? Good. Beef? Goooood” (or something along those lines). So we can all sometimes appreciate unexpected pairings. I’m going to give this a try since I already have chorizo and I keep buying asparagus at the Farmer’s Market.

Serves 4

1 pound large, thick, firm asparagus, lower third of the stalks peeled with a vegetable peeler or snapped off
1/4 cup good olive oil
4 ounces Spanish chorizo (but Portuguese chouriço will work as well), cut into 3/4-inch pieces
1 1/2 cups 3/4-inch bread cubes (croutons), preferably from a baguette or country bread loaf
1/4 cup whole almonds
1 cup cooked beans (optional; I used 3/4 pound fresh cranberry beans, shucked then boiled for 20 minutes in lightly salted water)
1/4 teaspoon salt
1/4 teaspoon freshly ground black pepper

Make this right as you are ready to eat. Cut each asparagus stalk into 3 or 4 pieces. Heat the oil in a large skillet until very hot. Add all the ingredients except the beans, if using, and salt and pepper. Cover and sauté over high heat for 5 to 6 minutes (thinner asparagus might be done sooner), tossing or stirring the mixture a few times, so it browns and cooks on all sides. Add the beans, if using, and salt and pepper, toss again, and serve.

Rustic Rhubarb Tarts

All text below from Smitten Kitchen, recipe adapted by SK from Good to the Grain.

The original recipe included a rhubarb hibiscus compote which I am sure would be wonderful, but I’m not so into the floral thing and quite into the rhubarb-vanilla bean combination, so I changed it. Because I’m the boss in my own kitchen. The original recipe also used 2 pounds of rhubarb. I discovered I’d only brought home 1 1/2 pounds of rhubarb, scaled the recipe down, then found that my tarts did best with less than the recommend amount of compote, 3 tablespoons instead of 4, which meant than I only needed 3/4 of the volume — brilliant! It couldn’t have worked out more perfectly and I am recommending the same below.

I bet you would also like to know, “Why corn flour?” Well, Kim Boyce says that she loves cornmeal but found that by combining it with corn flour she could get the full flavor and pretty color of cornmeal without the rough bite. It also makes for a wonderfully delicate crust, as it has no gluten in it, but by combining it with regular flour, you can get the structure you need. How about that!

1 cup corn flour
1 cup all-purpose flour
1/2 cup fine cornmeal
1/4 cup plus 2 tablespoons sugar
1 teaspoon Kosher or coarse salt
1 stick (4 ounces) cold unsalted butter, cut into small pieces
1/4 cup plus 2 tablespoons heavy cream
2 egg yolks
1 batch Rhubarb Vanilla Compote (recipe below)

In a food processor: Combine the dry ingredients in the work bowl of your food processor. Add the butter and pulse in short bursts, until the mixture resembles coarse cornmeal. Add heavy cream and egg yolks and pulse until combined; it will look crumbly but it will become one mass when kneaded together.

In a stand mixer: Whisk the dry ingredients in the bowl of a stand mixer. Using the paddle attachment, add the butter and turn the mixture speed to low (you’ll want to lock the top, so the mixture doesn’t fly about) and mix to break up the butter. Increase the speed to medium and mix until the butter is as coarse as cornmeal. Add the heavy cream and egg yolks and mix until combined. The dough will look crumbly but when pinched between your fingers, it will come together.

By hand: The butter can also be blended into the dry ingredients with a pastry blender, or you fingertips. The cream and egg yolks can be mixed into the butter mixture with a wooden spoon. You’ll likely want to turn the dough out onto a counter to gently knead it into one mass.

Shape the tarts: Divide the dough into 10 equal pieces. Lightly flour a work surface and using the heel of your hand, flatten the dough into a rough circle. Continue flattening until it is approximately 5 inches in diameter. Try to work quickly, so the dough doesn’t get too warm and soft, making it harder to handle. For more elegant edges, gently flatten the outer edge of the circle with your fingertips, making it thinner than the rest of the dough.

Spoon 3 tablespoons of the Rhubarb Vanilla Compote into the center of the dough. Fold the edge of the dough toward the compote and up, to create a ruffled edge; continue around the perimeter, letting the ruffles be their bad irregular selves. Slide a bench scraper or spatula under the tart and transfer it to a parchment-lined baking sheet. Continue with the remaining dough. Freeze the tarts on their tray for at least 1 hour or up to 2 weeks, wrapped tightly in plastic.

Bake the tarts: Preheat over to 375°F. Bake tarts, still frozen, for about 35 minutes or until the edges of the tarts are brown and the rhubarb is bubbling and thick. Serve warm or at room temperature. The tarts keep in an airtight container (or not, as I forgot to wrap mine and they were still awesome the next day) for up to 2 days.

Rhubarb Vanilla Compote

1 1/2 pounds rhubarb stalks
1 cup minus 1 tablespoon dark brown sugar (i.e. 15 tablespoons, if you want to drive yourself mad)
1/2 vanilla bean, split and seeds scraped

Rinse the rhubarb stalks and trim the very ends. Cut them in half lengthwise (unless they’re very slim) and then on the diagonal into 3/4-inch chunks. Leaving the last 1 1/2 cups aside, put 3 cups of the rhubarb into a large, heavy-bottomed pot. Add the brown sugar, vanilla bean seeds and pods and turn the heat to medium low. (You want to start at a low temperature to encourage the rhubarb to release its liquid. Unlike most compotes, this one adds no water.) Cook the rhubarb mixture, covered, for about 15 minutes, or until the mixture is saucy. Remove the cover and increase the heat to medium, cooking an additional 15 to 17 minutes, or until the rhubarb is completely broken down and thick enough that a spoon leaves a trail at the bottom of the pan. Discard your vanilla bean pods and add remaining rhubarb chunks to the compote. Pour the compote out onto a large plate to cool.

Do ahead: This keeps for one week in the fridge. It can also be used to fill pies, crisps and cobblers.

——————————————————————————–

rustic rhubarb tarts was originally published on smittenkitchen.com

all content and photos © 2006 – 2009 smitten kitchen

Croque Monsieur

On Monday I was having a grumpy day, so I indulged myself by renting a movie off my Comcast Movies on Demand. I ended up with Meryl Streep’s “It’s Complicated”, most notable (to me) for her character’s Alice Waters-like persona and all the scenes with and discussions of beautiful food. Watching her make Croque Monsieur at one point filled me with a flaming desire to eat same myself (and also got me reading my Alice Waters cookbook again), so here’s the recipe I’ve settled on. I haven’t actually made this yet, so feel free to deviate from the instructions if the Spirit leads. I might. Pair this with a salad of simple greens and vinaigrette and a cold white wine. I might add that in the movie, Meryl sets out homemade lavendar honey ice cream for dessert, so that may be next…

2 tablespoons unsalted butter
3 tablespoons all-purpose flour
2 cups hot milk
1 teaspoon kosher salt
1/2 teaspoon freshly ground black pepper
Pinch nutmeg
12 ounces Gruyere, grated (5 cups)
1/2 cup freshly grated Parmesan
16 slices white sandwich bread, crusts removed
Dijon mustard
8 ounces baked Virginia ham, sliced but not paper thin

Preheat the oven to 400 degrees F.

Melt the butter over low heat in a small saucepan and add the flour all at once, stirring with a wooden spoon for 2 minutes. Slowly pour the hot milk into the butter–flour mixture and cook, whisking constantly, until the sauce is thickened. Off the heat add the salt, pepper, nutmeg, 1/2 cup grated Gruyere, and the Parmesan and set aside.

To toast the bread, place the slices on 2 baking sheets and bake for 5 minutes. Turn each slice and bake for another 2 minutes, until toasted.

Lightly brush half the toasted breads with mustard, add a slice of ham to each, and sprinkle with half the remaining Gruyere. Top with another piece of toasted bread. Slather the tops with the cheese sauce, sprinkle with the remaining Gruyere, and bake the sandwiches for 5 minutes. Turn on the broiler and broil for 3 to 5 minutes, or until the topping is bubbly and lightly browned. Serve hot. Serves 4-8.

From Ina Garten’s 2004 Barefoot in Paris.

Blueberry Almond Turtles

7 Tbsp (2.5 oz) 60% cocoa bittersweet chocolate chips
1/4 cup dried wild blueberries (I get them at Trader Joe’s)
1/4 cup sliced almonds

Microwave chocolate in a glass bowl for 60 to 75 seconds or until melted. Stir in blueberries and nuts, then drop 5 rounded tablespoons onto parchment paper. Cool in refrigerator for 2 to 4 minutes or until firm.

Makes 5 turtles.

Per turtle: 104 cal, 8 g fat (3.5 g sat), 0 mg sodium, 9 g carbs, 1 g fiber, 2 g protein

From Women’s Health.

Marinated Carrots With Fresh Mint

By MARTHA ROSE SHULMAN
Published: April 12, 2010

// Use carrots at their sturdy, sweet best for this dish — or even those that have been in the refrigerator a little too long. I like to serve these marinated carrots as hors d’oeuvres, but they also make a nice addition to a lunchbox.

1 pound carrots, peeled, quartered lengthwise and cut in 2- or 3-inch lengths

Salt, preferably coarse sea salt, to taste

2 tablespoons sherry vinegar

2 tablespoons extra-virgin olive oil

1 tablespoon slivered fresh mint leaves

1. Steam the carrots for five to six minutes until just tender. Refresh with cold water, and toss with the salt, vinegar and olive oil. Marinate for 15 minutes, then toss with the mint. Serve at room temperature, or refrigerate and serve cold.

Yield: Four to eight servings.

Advance preparation: These keep well in the refrigerator for a week. Add the mint shortly before serving if possible.

Martha Rose Shulman can be reached at martha-rose-shulman.com.

Sweet and Sour Cucumber Pickles

From the NYT’s wonderful Recipes for Health section by Martha Rose Shulman.

These aren’t like any cucumber pickles I’ve ever tasted. The cucumbers are marinated in seasoned rice vinegar with a small amount of sesame oil. They’re great on sandwiches or with cottage cheese, and go well with fish and with Asian dishes.

1 long European style cucumber, or 3 or 4 Persian cucumbers, or 2 regular cucumbers

Salt

1/3 cup seasoned rice vinegar

1 teaspoon dark sesame oil

Pinch of hot red pepper flakes (optional)

1. If you cannot find unwaxed cucumbers, peel them. Slice thin, and toss in a colander with about 1/4 teaspoon salt. Place in the sink, and let sit for 15 to 30 minutes. Rinse and drain on paper towels.

2. Place the cucumbers in a bowl, and toss with the vinegar, sesame oil and pepper flakes (if using). Refrigerate for 15 minutes or longer before serving.

Yield: Serves four.

Advance preparation: The marinated cucumbers will keep for several days in the refrigerator.

Chicken and Garlic Chowder

This is one of THE most divine soups I’ve ever made. I’m a huge soup junkie – there is just almost nothing better on a cool night than a rich, savory broth and crusty bread. For this soup, I ended up making the sofrito myself, since I couldn’t find it anywhere (I’m not sure what sort of supermarkets the editors of Food and Wine are shopping at…), but it was easy and I froze the leftovers in ice cube trays to stick into future reprises.

Text below from Food and Wine.

The beauty of this recipe is that it takes advantage of an array of terrific prefab ingredients, from prepeeled garlic and precut butternut squash to rotisserie chicken and frozen sofrito (the Spanish green-pepper-and-onion seasoning paste). Poaching the prepeeled garlic cloves in milk helps bring out an extraordinary depth of flavor.

The gentle flavors of this chowder are best matched by a full-bodied Chardonnay without too much oak. Some of the best examples come from the windy hilltops of the Sonoma Coast, like the clean, refreshing 2004 Hartford Sonoma Coast and the lively 2003 Ramey Sonoma Coast.

5 peeled garlic cloves
1 1/2 cups milk
6 cups chicken stock or low-sodium broth
12 ounces peeled precut butternut squash, cut into 1-inch cubes
1/4 cup sofrito (see Note)
One 3 1/2-pound rotisserie chicken—juices reserved, skin and bones discarded, meat shredded (about 4 cups)
1/4 cup frozen peas
Salt and freshly ground pepper

In a small saucepan, combine the prepeeled garlic cloves with the milk and bring to a simmer. Cook over moderately low heat until the garlic is soft and the milk has reduced to 1 cup, about 40 minutes. Transfer the mixture to a blender and puree it until smooth.

Meanwhile, in a large soup pot, combine the chicken stock, squash and sofrito and bring to a boil. Cover and cook over moderate heat until the squash is just tender, about 20 minutes. Add the shredded chicken and its juices, the peas and the creamy garlic puree. Season with salt and pepper. Simmer the chowder for 5 minutes longer and serve. Serves 6.

Sofrito is available in tubs in the freezer section of many supermarkets.

Chipotle Avocado Turkey Burgers

Also from Men’s Health…best source for this type of healthy yumminess!

8 oz lean ground turkey
2 wheat or whole-grain buns, toasted
1/2 avocado, sliced
2 Tbsp chipotle salsa
1/4 tsp salt
1/4 tsp pepper
Pinch of cumin
1 tomato, sliced
1/2 red onion, thinly sliced
2 Tbsp low-fat sour cream

1. Mix the meat, salt, pepper, and cumin, and form it into two equal patties.

2. Preheat a skillet or frying pan over medium-high heat. Coat with a bit of oil and add the burgers, cooking them for 4 to 5 minutes a side, until slightly firm to the touch.

3. Dress each bun with avocado slices, tomato, and red onion. Top with the burger, sour cream, and salsa.

Per serving 419 calories, 27 g protein, 37 g carbs, 21 g fat (5 saturated), 7 g fiber, 685 mg sodium